Replacing ListView with RecyclerView
31 Jan 2016
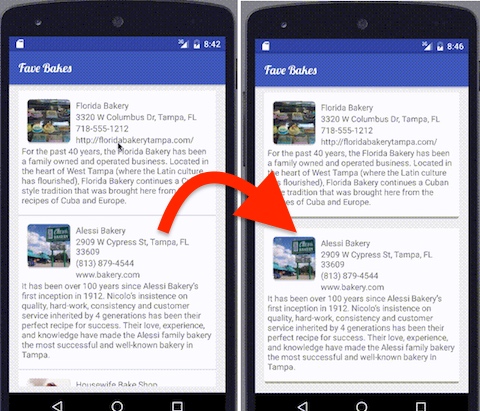
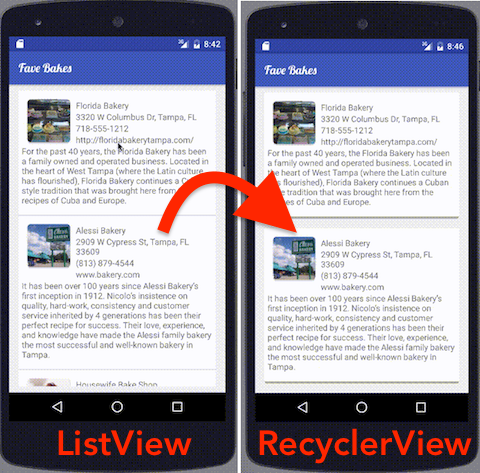
android programming development UI UX materialdesign animationSo if you’ve ever written an Android app, chances are that you’ve used a ListView. If you’re new to Android development, ListView is a common view that allows you to display in a table like view. Here’s a sample of what a ListView looks like running on an Android device, next to what a RecyclerView with the same data and same item layout. Both ListView and RecyclerView are similar in that they allow developers to display a collection of items in a table, or list, that can be scrolled through. It’s a very common UI component.
In this post we are going to look at an existing app that uses a ListView. Then we’re going to step by step replace the ListView with a RecyclerView. Let’s start looking at our existing app: Fave Bakes!
An introduction to Fave Bakes
Our existing app displays a list of favorite bakeries in the area. The bakery name, phone number, address, website and logo appear to the user and allow them to peruse a number of local bakeries. So let’s take a look at our Bakery model.
public class Bakery {

    public String bakeryName;
    public String description;
    public String phoneNumber;
    public String websiteUrl;
    public String address;
    public Bitmap logo;

    public Bakery(String bakeryName,
                  String description,
                  String phoneNumber,
                  String websiteUrl,
                  String address) {

        this.bakeryName = bakeryName;
        this.description = description;
        this.address = address;
        this.phoneNumber = phoneNumber;
        this.websiteUrl = websiteUrl;
    }
}
While not a true POJO we just wanted something simple for our scenario. We load all the bakery data into this model so that we can display it in a ListView. So far pretty straightforward. Speaking of which, here’s our activity layout:
<?xml version="1.0" encoding="utf-8"?>

<RelativeLayout xmlns:android="http://schemas.android.com/apk/res/android"
    xmlns:app="http://schemas.android.com/apk/res-auto"
    xmlns:tools="http://schemas.android.com/tools"
    android:layout_width="match_parent"
    android:layout_height="match_parent"
    android:paddingBottom="@dimen/spacer_10"
    android:paddingLeft="@dimen/spacer_16"
    android:paddingRight="@dimen/spacer_16"
    android:paddingTop="@dimen/spacer_10"
    android:background="@color/lightGray"
    app:layout_behavior="@string/appbar_scrolling_view_behavior"
    tools:context=".activities.BakeryListingsActivity"
    tools:showIn="@layout/activity_bakery_listings">

    <ListView>
        android:id="@+id/listings_view"
        android:layout_width="match_parent"
        android:layout_height="match_parent"
        android:background="@color/lightGray">
    </ListView>

</RelativeLayout>
In FaveBakes we’re dealing with a very simple activity that just has a ListView that takes up the screen, sets the background color and adds a padding to the top and bottom, left and right. Our list item view for each item of the ListView is a bit more complicated. It displays the bakery image to the left of the bakery name, address, phone number, website and underneath all of that is a description of the bakery. Here’s what our list_item_bakery.xml looks like and the layout xml that creates it.

<?xml version="1.0" encoding="utf-8"?>
<LinearLayout
    xmlns:android="http://schemas.android.com/apk/res/android"
          android:layout_width="match_parent"
          android:layout_height="match_parent"
          android:orientation="vertical">

    <RelativeLayout
        android:id="@+id/bakery_info"
        android:layout_width="match_parent"
        android:layout_height="match_parent"
        android:layout_alignParentLeft="true"
        android:layout_alignParentTop="true"
        android:padding="@dimen/spacer_5"
        android:background="@color/white">

        <RelativeLayout
            android:id="@+id/logo_layout"
            android:layout_width="90dp"
            android:layout_height="90dp">

            <ImageView
                android:id="@+id/bakery_logo"
                android:layout_width="fill_parent"
                android:layout_height="fill_parent" />

        </RelativeLayout>

        <TextView
            android:id="@+id/bakery_name"
            android:layout_width="match_parent"
            android:layout_height="wrap_content"
            android:layout_marginTop="@dimen/spacer_10"
            android:gravity="center_vertical"
            android:textSize="@dimen/default_font_size"
            android:layout_toEndOf="@+id/logo_layout" />

        <TextView
            android:id="@+id/bakery_address"
            android:layout_width="match_parent"
            android:layout_height="wrap_content"
            android:layout_below="@+id/bakery_name"
            android:textSize="@dimen/default_font_size"
            android:layout_toRightOf="@+id/logo_layout" />

        <TextView
            android:id="@+id/bakery_phone"
            android:layout_width="match_parent"
            android:layout_height="wrap_content"
            android:layout_below="@+id/bakery_address"
            android:textSize="@dimen/default_font_size"
            android:layout_toRightOf="@+id/logo_layout" />

        <TextView
            android:id="@+id/bakery_website"
            android:layout_width="match_parent"
            android:layout_height="wrap_content"
            android:layout_below="@+id/bakery_phone"
            android:textSize="@dimen/default_font_size"
            android:layout_toRightOf="@+id/logo_layout" />

        <TextView
            android:id="@+id/bakery_description"
            android:layout_width="match_parent"
            android:layout_height="wrap_content"
            android:textSize="@dimen/default_font_size"
            android:layout_below="@id/bakery_website"
            android:layout_marginBottom="@dimen/spacer_10" />

    </RelativeLayout>

</LinearLayout>
The next part of our existing app that we’ll look at is the Adapter. This app uses an ArrayAdapter of Bakery items to fill the ListView with the details of the individual Bakery objects. Our constructor takes in
- the context
- the resource of the item layout and
- list of the Bakery objects we want to display.
We override the public View getView method to display our bakery information in each item of the ListView. (2) First we are going to see if we’ve already inflated the layout of the item. Inflating Android layouts is a resource intensive activity so if we’ve already done it before we don’t need to do it again. Simply we can reuse what we have already inflated and just change the values. (3) We get the bakery we want to display by looking up the position in the list of Bakery objects we passed in. (4) Then we use the Bakery object at that position to set the data for the view. (5) Finally, we return the fully configured View.
public class BakeryAdapter extends ArrayAdapter<Bakery> {

    private final List<Bakery> bakeries;
    private Context context;
    private int itemResource;

    public BakeryAdapter(Context context, int itemResource, List<Bakery> bakeries) {

        // 1. Initialize our adapter
        super(context, R.layout.list_item_bakery, bakeries);
        this.bakeries = bakeries;
        this.context = context;
        this.itemResource = itemResource;
    }

    @Override
    public View getView(int position, View convertView, ViewGroup parent) {

        // 2. Have we inflated this view before?
        View itemView;
        if (convertView != null) {

            // 2a. We have so let's reuse.
            itemView = convertView;
        }
        else {

            // 2b. We have NOT so let's inflate
            LayoutInflater inflater = (LayoutInflater) context.getSystemService(Context.LAYOUT_INFLATER_SERVICE);
            itemView = inflater.inflate(this.itemResource, parent, false);
        }

        // 3. Get the bakery to appear in this item
        Bakery bakery = this.bakeries.get(position);
        if (bakery != null) {

            // 4. Inflate the UI widgets
            ImageView bakeryLogo = (ImageView) itemView.findViewById(R.id.bakery_logo);
            TextView bakeryName = (TextView) itemView.findViewById(R.id.bakery_name);
            TextView bakeryAddress = (TextView) itemView.findViewById(R.id.bakery_address);
            TextView bakeryDescription = (TextView) itemView.findViewById(R.id.bakery_description);
            TextView bakeryPhone = (TextView) itemView.findViewById(R.id.bakery_phone);
            TextView bakeryWebsite = (TextView) itemView.findViewById(R.id.bakery_website);

            // 5. Set the UI widgets with appropriate data from the Bakery model
            bakeryName.setText(bakery.bakeryName);
            bakeryAddress.setText(bakery.address);
            bakeryPhone.setText(bakery.phoneNumber);
            bakeryWebsite.setText(bakery.websiteUrl);
            bakeryDescription.setText(bakery.description);
            bakeryLogo.setImageBitmap(bakery.logo);
        }

        return itemView;
    }
}
Now it’s time to take a look at our Activity code to see how the ArrayAdapter
public class BakeryListingsActivity extends AppCompatActivity {

    private ListView listingsView;
    private List<Bakery> bakeries;

    @Override
    protected void onCreate(Bundle savedInstanceState) {
        super.onCreate(savedInstanceState);

        // 1. Inflate the activity & perform app styling
        setContentView(R.layout.activity_bakery_listings);
        setupActionBarTheme();

        // 2. Load the Bakery data
        loadBakeries();

        // 3. Initialize the Bakery adapter
        BakeryAdapter adapter = new BakeryAdapter(this, R.layout.list_item_bakery, bakeries);

        // 4. Inflate our ListView and set the adapter on it
        listingsView = (ListView)findViewById(R.id.listings_view);
        listingsView.setAdapter(adapter);

        // 5. Handle the click
        listingsView.setOnItemClickListener(new AdapterView.OnItemClickListener() {

            @Override
            public void onItemClick(AdapterView<?> parent, View view, int position, long id) {

                ListView listView = (ListView) view.getParent();
                if (listView != null) {

                    Bakery bakery = bakeries.get(position);
                    if (bakery != null) {

                        Toast.makeText(context, "Clicked on " + bakery.bakeryName, Toast.LENGTH_SHORT).show();
                    }
                }
            }
        });
    }

    // Loads bakery data into List<Bakery>
    private void loadBakeries() {...}

    // Sets the app title to use a custom font
    private void setupActionBarTheme() {...}
}
So that’s basically it. Here’s a GIF showing what the app looks like once launched. For a complete listing of this project go ahead and check out the master and feature branch on GitHub.

Updating to RecyclerView
We’ve just reviewed how ListView is used in Android. So now let’s do away with the old and bring in the new… bring on the RecyclerView!
Ugh, whyyyy?
So why would we want to replace ListView with RecyclerView? Well RecyclerView is, as we’ll come to see, very flexible. RecyclerView also forces you to implement a much more efficient table widget. Finally, RecyclerView lets you animate and decorate items in your widget a bit simpler.
RecyclerView is able to be more flexible than the older ListView because it does less. ListView handles the touch events such as scrolling and tapping or long pressing an item in the list. ListView positions items on the screen and also handles the most basic of animations that occur after adding or removing items in the list. RecyclerView delegates this functionality out to other classes. So where ListView handled
- Setting the item’s position
- Handling user interaction
- Basic animation
RecyclerView leverages the following classes to provide the same functionality.
- RecyclerView.ViewHolder to handle the item’s content/user interaction and where in the RecyclerView it belongs.
- RecyclerView.Adapter to provide binding between the items and the underlying data.
- RecyclerView.LayoutManager to set how the items are laid out.
- RecyclerView.ItemAnimator to define animations of items.
- RecyclerView.ItemDecorator to decorate the items.
Let’s take a closer look at each of these classes.
RecyclerView.ViewHolder
The ViewHolder may not be entirely new to you. The ViewHolder existed prior and was used by ListView to access items without having to look them up with the findViewById() method which could prove costly when scrolling lots of items. The ViewHolder is extended by the RecyclerView.Adapter to bind the underlying data set to the view of the item.
RecyclerView.Adapter
This is likely to be the most familiar part of the RecyclerView. The Adapter links the data in your data set with the items of the view. In our example we are going to be displaying a list of bakeries. Each item will have to display the bakery name, a description, an address, phone number and an image of the bakery logo. Each store item, when tapped will then prompt the user to dial the bakery.
RecyclerView.LayoutManager
The LayoutManager is responsible for setting the size and position of the items in the RecyclerView as they appear in the RecyclerView. The API provides some baked in LayoutManager’s for displaying items like a list (LinearLayoutManager), in a uniform positioned grid (GridLayoutManager) or a staggered position/size grid (StaggeredGridLayoutManager). We’ll cover the LinearLayoutManager since we’re converting a ListView app to the RecyclerView.
RecyclerView.ItemDecorator
With the ItemDecorator we’ll be able to customize how our items get displayed. Want to add spacing between items on your list? Want to add a drop shadow? a border? all of the above? ItemDecorator’s can be added to your RecyclerView so that if you needed just spacing or borders you can add multiple decorators. We’re going to loosely define our decorators and see how we can leverage them in our project.
RecyclerView.ItemAnimator
ItemAnimator’s responsibility is to … animate the items. :) When items are added to, or removed from, the RecyclerView the ItemAnimator dictates how the item is animated in, or out, of view. Creating a custom ItemAnimator is beyond the scope of this post but we’ll take advantage of some baked in ItemAnimators. A fantastic library packed full of ItemAnimators can be found over at RecyclerView Animations by Daichi Furiya.
Let’s get on with it…
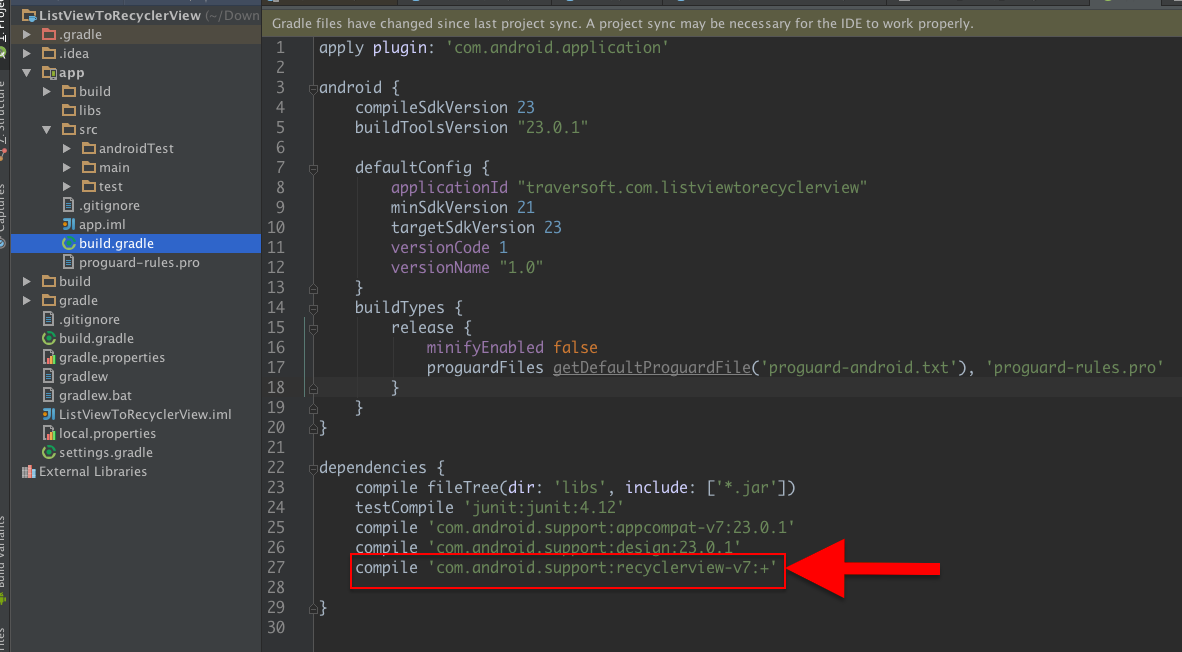
So that’s a quick overview of the RecyclerView and it’s components. Now we’re going to go replace the ListView with a RecyclerView leveraging the components we just briefly talked about. Before we can begin though we need to tell our project where to pickup the API to use the RecyclerView. We’ll need to add the following: compile 'com.android.support:recyclerview-v7:+' under the dependencies section.
If you need help doing this, in Android Studio find the build.gradle file in your Project view that is under your app folder. If you need help figuring which build.gradle this is here’s a screenshot to help you out.
Once you update the gradle file you’ll need to sync your project with your updated gradle file. This is done by tapping on the button shown below. Android Studio will go out and download the necessary library to your project so that you’ll be able to start using it.

Since our model is going to stay the same, let’s start with our activity layout file. Our parent layout, RelativeLayout stays exactly the same. We just swap out the ListView for android.support.v7.widget.RecyclerView.
Using the support version of the RecyclerView will allow us to reach many more Android phones. I’ll leave this up to you whether you want to support older versions of Android or just the latest and greatest devices with the latest version of Android.
We keep the id the same so that we don’t have to change that in our code, width, height and background all also stay the same.
<?xml version="1.0" encoding="utf-8"?>

<RelativeLayout xmlns:android="http://schemas.android.com/apk/res/android"
    xmlns:app="http://schemas.android.com/apk/res-auto"
    xmlns:tools="http://schemas.android.com/tools"
    android:layout_width="match_parent"
    android:layout_height="match_parent"
    android:paddingBottom="@dimen/spacer_10"
    android:paddingLeft="@dimen/spacer_16"
    android:paddingRight="@dimen/spacer_16"
    android:paddingTop="@dimen/spacer_10"
    android:background="@color/lightGray"
    app:layout_behavior="@string/appbar_scrolling_view_behavior"
    tools:context=".activities.BakeryListingsActivity"
    tools:showIn="@layout/activity_bakery_listings">

    <android.support.v7.widget.RecyclerView
        android:id="@+id/listings_view"
        android:layout_width="match_parent"
        android:layout_height="match_parent"
        android:background="@color/lightGray">
    </android.support.v7.widget.RecyclerView>

</RelativeLayout>
Now let’s go back to look at our adapter. Before we can though we need to implement a ViewHolder. Remember from earlier, the ViewHolder helps the Adapter bind data to the item views. Our holder is going to extend RecyclerView.ViewHolder while implementing the View.OnClickListener interface. (1) Our constructor will take a Context and a View. (2) We’ll access our item UI widgets here so we define all of our TextView’s and our ImageView as we did in our ArrayAdapter. We’re basically moving that into our BakeryHolder. The ViewHolder knows about the Bakery it’s bound to so no need to look up other views, figure out the position clicked and look up the bakery tied to that position. (3) Binding is something we need the BakeryHolder to do so we’ll go ahead and create a method called bindBakery that takes in a Bakery object and sets the values of the UI widgets. (5) Lastly, we migrate our onClick implementation into our BakeryHolder. This makes a bit more sense than having it on the ListView.
public class BakeryHolder extends RecyclerView.ViewHolder implements View.OnClickListener {

    private final ImageView bakeryLogo;
    private final TextView bakeryName;
    private final TextView address;
    private final TextView description;
    private final TextView phone;
    private final TextView website;

    private Bakery bakery;
    private Context context;

    public BakeryHolder(Context context, View itemView) {

        super(itemView);

        // 1. Set the context
        this.context = context;

        // 2. Set up the UI widgets of the holder
        this.bakeryLogo = (ImageView) itemView.findViewById(R.id.bakery_logo);
        this.bakeryName = (TextView) itemView.findViewById(R.id.bakery_name);
        this.address = (TextView) itemView.findViewById(R.id.bakery_address);
        this.description = (TextView) itemView.findViewById(R.id.bakery_description);
        this.phone = (TextView) itemView.findViewById(R.id.bakery_phone);
        this.website = (TextView) itemView.findViewById(R.id.bakery_website);

        // 3. Set the "onClick" listener of the holder
        itemView.setOnClickListener(this);
    }

    public void bindBakery(Bakery bakery) {

        // 4. Bind the data to the ViewHolder
        this.bakery = bakery;
        this.bakeryName.setText(bakery.bakeryName);
        this.address.setText(bakery.address);
        this.phone.setText(bakery.phoneNumber);
        this.website.setText(bakery.websiteUrl);
        this.description.setText(bakery.description);
        this.bakeryLogo.setImageBitmap(bakery.logo);
    }

    @Override
    public void onClick(View v) {

        // 5. Handle the onClick event for the ViewHolder
        if (this.bakery != null) {

            Toast.makeText(this.context, "Clicked on " + this.bakery.bakeryName, Toast.LENGTH_SHORT ).show();
        }
    }
}
Our adapter can now leverage our new BakeryHolder class. In BakeryAdapter, our constructor remains the same as it was before. However, now we extend the RecyclerView.Adapter
- public BakeryHolder onCreateViewHolder(ViewGroup parent, int viewType)
- public void onBindViewHolder(BakeryHolder holder, int position)
- public int getItemCount()
In onCreateViewHolder, (3) we inflate the view and return a ViewHolder. Unlike ListView, RecyclerView will not call this method again unless if the position of the item changes in the data set, the item itself is invalidated or the new position cannot be determined. If you’re not adding items, removing items, or changing the position of the items in the data set this method should be called once. Nice!
In onBindViewHolder, we (5) access the bakery at the proper position and bind it to the ViewHolder. This is where that “magic” happens that tells an item at a particular position which data to display. Finally we override the getItemCount and return the number of items in our data set.
public class BakeryAdapter extends RecyclerView.Adapter<BakeryHolder> {

    private final List<Bakery> bakeries;
    private Context context;
    private int itemResource;

    public BakeryAdapter(Context context, int itemResource, List<Bakery> bakeries) {

        // 1. Initialize our adapter
        this.bakeries = bakeries;
        this.context = context;
        this.itemResource = itemResource;
    }

    // 2. Override the onCreateViewHolder method
    @Override
    public BakeryHolder onCreateViewHolder(ViewGroup parent, int viewType) {

        // 3. Inflate the view and return the new ViewHolder
        View view = LayoutInflater.from(parent.getContext())
                                  .inflate(this.itemResource, parent, false);
        return new BakeryHolder(this.context, view);
    }

    // 4. Override the onBindViewHolder method
    @Override
    public void onBindViewHolder(BakeryHolder holder, int position) {

        // 5. Use position to access the correct Bakery object
        Bakery bakery = this.bakeries.get(position);

        // 6. Bind the bakery object to the holder
        holder.bindBakery(bakery);
    }

    @Override
    public int getItemCount() {

        return this.bakeries.size();
    }
}
With our Adapter updated and ViewHolder created we can update our Activity. Our adapter constructor doesn’t change. It still takes a Context, the resource id of the item layout and the data set. (5) We change the type of the listingsView from ListView to RecyclerView. (6) Seeing as our RecyclerView doesn’t change height or width within FaveBakes, we can tell listingsView that it has a fixed size. This is for performance reasons. If your app requires the RecyclerView to change size don’t do this. (9) We now continue to set the adapter of our RecyclerView. Nothing changes here either.
// 3. Initialize the Bakery adapter... unchanged.
BakeryAdapter adapter = new BakeryAdapter(this, R.layout.list_item_bakery, bakeries);

// 4. Initialize ItemAnimator, LayoutManager and ItemDecorators

// 5. Setup our RecyclerView
listingsView = (RecyclerView)findViewById(R.id.listings_view);

// 6. For performance, tell OS RecyclerView won't change size
listingsView.setHasFixedSize(true);

// 7. Set the LayoutManager

// 8. Set the ItemDecorators

// 9. Attach the adapter to RecyclerView
listingsView.setAdapter(adapter);
Now the extra RecyclerView bits
Just a few more things to take care of. Namely, we have to setup a LayoutManager. We’ll be setting up ItemDecorators and an ItemAnimator but those are optional for you to setup. Let’s create an instance of a RecyclerView.LayoutManager. As this is an abstract class we will need to implement one of those layout managers we reviewed earlier. In this case as we want to closely replicate the ListView we will use a LinearLayoutManager.
Again these next steps are optional. As it stands now we’ve completely replicated our ListView. Let’s see how easy it is to add vertical spacing between items, add drop shadow to items and animate items. First we’ll define an ItemDecorator to handle vertical spacing between items in the list and then another ItemDecorator to handle a drop shadow. These effects could be combined in one ItemDecorator but I wanted to show you that you can combine ItemDecorators on your RecyclerView to get a desired effect.
For instance, to create your own custom ItemDecorator we’ll extend the RecyclerView.ItemDecoration class. For adding in some vertical spacing, we override the getItemOffsets method. The outRect parameter that gets passed in lets you access the Rect that the item will take up with no padding. (2) Setting the value of the bottom field on outRect to a value will create an offset to that side of the rectangle representing the item. What we do in the VerticalSpaceItemDecorator is check to make sure that the item we’re looking at isn’t the last item in the collection. No need to add a bottom padding to the last item. We could have acheived the same result by adding an offset value to the top field of outRect and not adding that padding to the first item in the collection.
public class VerticalSpaceItemDecorator extends RecyclerView.ItemDecoration {

    private final int verticalSpaceHeight;

    public VerticalSpaceItemDecorator(int verticalSpaceHeight) {

        this.verticalSpaceHeight = verticalSpaceHeight;
    }

    @Override
    public void getItemOffsets(Rect outRect,
                               View view,
                               RecyclerView parent,
                               RecyclerView.State state) {

        // 1. Determine if we want to add a spacing decorator
        if (parent.getChildAdapterPosition(view) != parent.getAdapter().getItemCount() - 1) {

            // 2. Set the bottom offset to the specified height
            outRect.bottom = verticalSpaceHeight;
        }
    }
}
With a drop shadow, we’ll first create a new drawable and name it drop_shadow.xml. Then we’ll create a shape, with a size and color as seen below.
<?xml version="1.0" encoding="utf-8"?>
<shape xmlns:android="http://schemas.android.com/apk/res/android"
    android:shape="rectangle">
    <size android:height="4dp" />
    <solid android:color="@color/gray" />
</shape>
Then we’ll again extend RecyclerView.ItemDecoration in a new class. In our constructor we load the drawable resource we just created. Then in the onDraw mehod that we will override, we’ll make sure we set the drop shadow rectangle to (1) be the same width as the RecyclerView and (2 & 3) iterate through each item to (4) determine the top and bottom constraints of where the drop shadow should be drawn. (5) Once we have the bounds of the drawable for the drop shadow we (6) draw it to the canvas.
public class ShadowVerticalSpaceItemDecorator extends RecyclerView.ItemDecoration {

    private Drawable divider;

    public ShadowVerticalSpaceItemDecorator(Context context, int resId) {

        // Use a custom divider specified by a drawable
        this.divider = ContextCompat.getDrawable(context, resId);
    }

    @Override
    public void onDraw(Canvas c, RecyclerView parent, RecyclerView.State state) {

        // 1. Get the parent (RecyclerView) padding
        int left = parent.getPaddingLeft();
        int right = parent.getWidth() - parent.getPaddingRight();

        // 2. Iterate items of the RecyclerView
        for (int childIdx = 0; childIdx < parent.getChildCount(); childIdx++) {

            // 3. Get the item
            View item = parent.getChildAt(childIdx);

            // 4. Determine the item's top and bottom with the divider
            RecyclerView.LayoutParams params = (RecyclerView.LayoutParams) item.getLayoutParams();
            int top = item.getBottom() + params.bottomMargin;
            int bottom = top + divider.getIntrinsicHeight();

            // 5. Set the divider's bounds
            this.divider.setBounds(left, top, right, bottom);

            // 6. Draw the divider
            this.divider.draw(c);
        }
    }
}
So that’s it, we’ve create two item decorators for our RecyclerView. Now it’s time to add them onto our RecyclerView so that we get the desired effect. Let’s look back to our Activity code. First we create an instance of RecyclerView.LayoutManager and instantiate it as a LinearLayoutManager. This gives us that same vertical ListView like look and feel.
Next we define a spacing for how far apart we want our list items to appear. In our case 20. We pass that into the VerticalSpaceItemDecorator constructor we created earlier. Then lastly we’ll create an instance of a ShadowVerticalSpaceItemDecorator passing in the activity as the context and the resource of the drop_shadow drawable. To wrap everything up we’ll (7) set the layoutManager of the RecyclerView and (8) add the item decorators to the RecyclerView. Here we make two calls to the addItemDecoration method on the RecyclerView instance. First we add the shadow and then the vertical spacing decoration.
// 4. Initialize ItemAnimator, LayoutManager and ItemDecorators
RecyclerView.LayoutManager layoutManager = new LinearLayoutManager(this);

int verticalSpacing = 20;
VerticalSpaceItemDecorator itemDecorator =
  new VerticalSpaceItemDecorator(verticalSpacing);
ShadowVerticalSpaceItemDecorator shadowItemDecorator =
  new ShadowVerticalSpaceItemDecorator(this, R.drawable.drop_shadow);

...

// 7. Set the LayoutManager
listingsView.setLayoutManager(layoutManager);

// 8. Set the ItemDecorators
listingsView.addItemDecoration(shadowItemDecorator);
listingsView.addItemDecoration(itemDecorator);
If we go ahead and compile and run we should see the following:

TL;DR
We reviewed an existing app that leveraged ListView to display data. We added the ability to use RecyclerView by updating and syncing our gradle file. Then we covered the RecyclerView and it’s most important components such as:
- RecyclerView.ViewHolder to handle the item’s content/user interaction and where in the RecyclerView it belongs.
- RecyclerView.Adapter to provide binding between the items and the underlying data.
- RecyclerView.LayoutManager to set how the items are laid out.
- RecyclerView.ItemAnimator to define animations of items.
- RecyclerView.ItemDecorator to decorate the items.
Then we went and finished our migration to RecyclerView by implementing the components listed above and changing our activity layout to swap out ListView for RecyclerView. The project is located on GitHub. To look at the whole project using the list view you can find it here. Or if you’re looking for the update it’s on the feature/replace-list-view branch located here.
I hope this helps you updating your project to RecyclerView.