
Android Studio Tools - Layout Inspector
9 May 2017
android programming development tools android-studioHave you ever worked out a layout xml file, run your app and see something other than what you were expecting? Or perhaps not see the view you expected at all? The Layout Inspector of Android Studio is a powerful tool that helps you visualize the UI of your app. I know what you’re thinking. You’ve seen the Eclipse RCP-esque Android Device Monitor and the not so easy to use View Hierarchy. This is definitely not that.
Where can I find the Android Studio Layout Inspector?
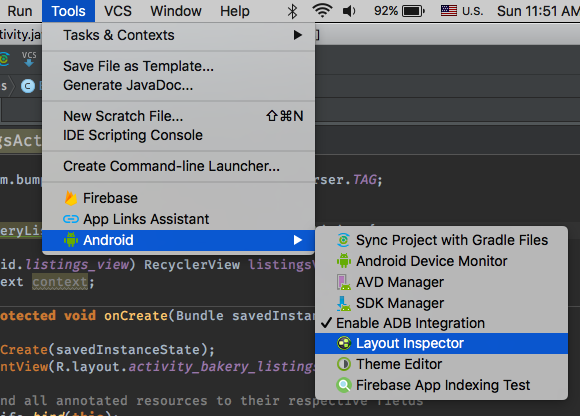
Fear not! Again, we’re NOT talking about the Android Device Monitor. Be sure to have your app running on an emulator or a device that’s plugged into your development machine. From Android Studio, select Tools -> Android -> Layout Inspector and launch the inspector! That’s it!
Once you launch the inspector it will prompt you to select the process you want to connect it to.
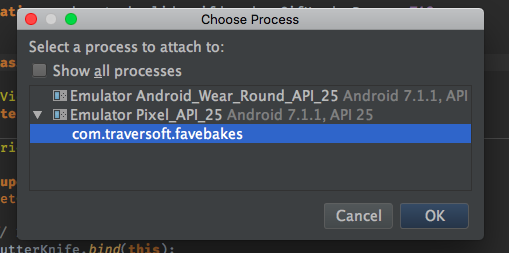
This is why it was important to have your app running on an emulator or device when you launched the Layout Inspector. It should be noted that Layout Inspector will inspect the currently running view. For example, if you want to inspect a view then it has to be the view running on the device/emulator when you launch the inspector.
In the example for this article I’m going to run my FaveBakes app. You can check it out from the Play Store or you can check out my GitHub for the code. I write about this app a lot. Mostly because I’m not as industrious as the team at RayWenderlich to come up with fun demo apps for every article. Here’s a screenshot of the app in action.

NOTE:
By the way, if you like Android tutorials, did you know the awesome people at RayWenderlich.com write Android tutorials too? You should check ‘em out when you finish reading this. Tell ‘em I sent you.
Layout Inspector
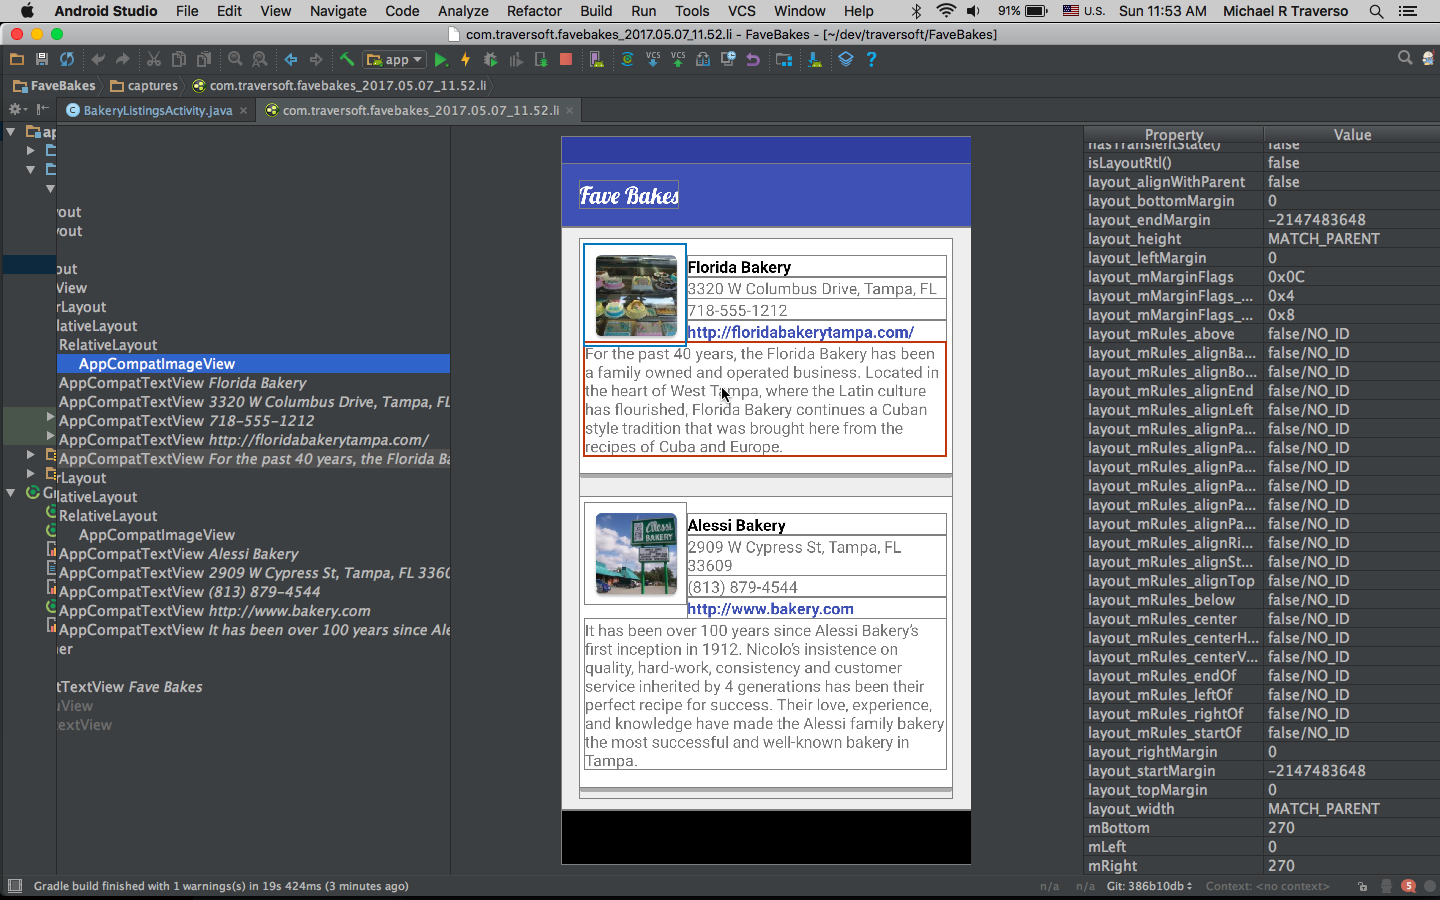
This is the Layout Inspector.
Hopefully you’ll be able to see how much more useful this is compared to the View Hierarchy. This view is comprised of three panes. The pane on the left shows you a hierarchy of your current UI snapshot. You can expand & collapse the views to find the one you’re looking for. This is helpful when you want to check out performance of your app too. For example, maybe you don’t need to nest that many views OR maybe you do need to nest that one view into something else in order to display your UI properly. Clicking an item in the hierarchy highlights it in the middle pane.
The middle pane of the Layout Inspector is where you can visualize your app. This will look the most familiar to you because it’s a living screenshot of your app. In the image above you’ll notice that DecorView is highlighted in the hierarchy pane. Since this is the top most view in the hierarchy we can see a faint blue line around the entire view in the middle pane. If I had highlighted an ImageView you’d see a faint blue line around the ImageView. Using your mouse and hovering over UI components in the middle pane you’ll see a red line drawn around the currently moused over view. This helps you see which component you’re looking at.
Finally, the right pane of the Layout Inspector is an inspector panel that lets you browse through all the attributes that are set for the selected view. Don’t see the UI component you were expecting? Find it in the hierarchy and check it’s visibility attribute. That top margin doesn’t look right, was it 8dp or 16dp? Whatever it is it’ll be easy to see now!
NOTE:
Instead of scrolling for the attribute you want to inspect in the right pane, simply click somewhere on that right pane and type the attribute name. It’ll automatically begin to search for it and if it finds what you’re looking for. Then you can use your up & down arrow keys to cycle through the results.
One last tip
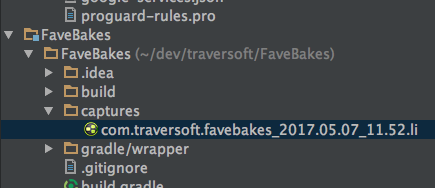
Once you run the Layout Inspector, Android Studio will output a file to a captures directory of your project. These files will have a file extension of li. These are proprietary files created to show your view, it’s attributes and hierarchy within Android Studio. other neat thing about them is that once you run them you can double click them from within Android Studio and they’ll open back up to show the same information as when you generated it.
TL;DR
Every release of Android Studio comes with something new. As of the 2.2 release Android Studio has a much more useful successor to the View Hierarchy. The Layout Inspector is a great utility for understanding your UI as it appears on the device/emulator.
As always, I hope this helps. If you’ve got any questions reach out to me on Twitter, Facebook or in the comments below.